Upper lip waxing is a popular method for those seeking smooth skin and effective hair removal. Many people choose lip waxing over other methods for its convenience and long-lasting results. Here's a quick rundown of what you need to know about upper lip waxing:
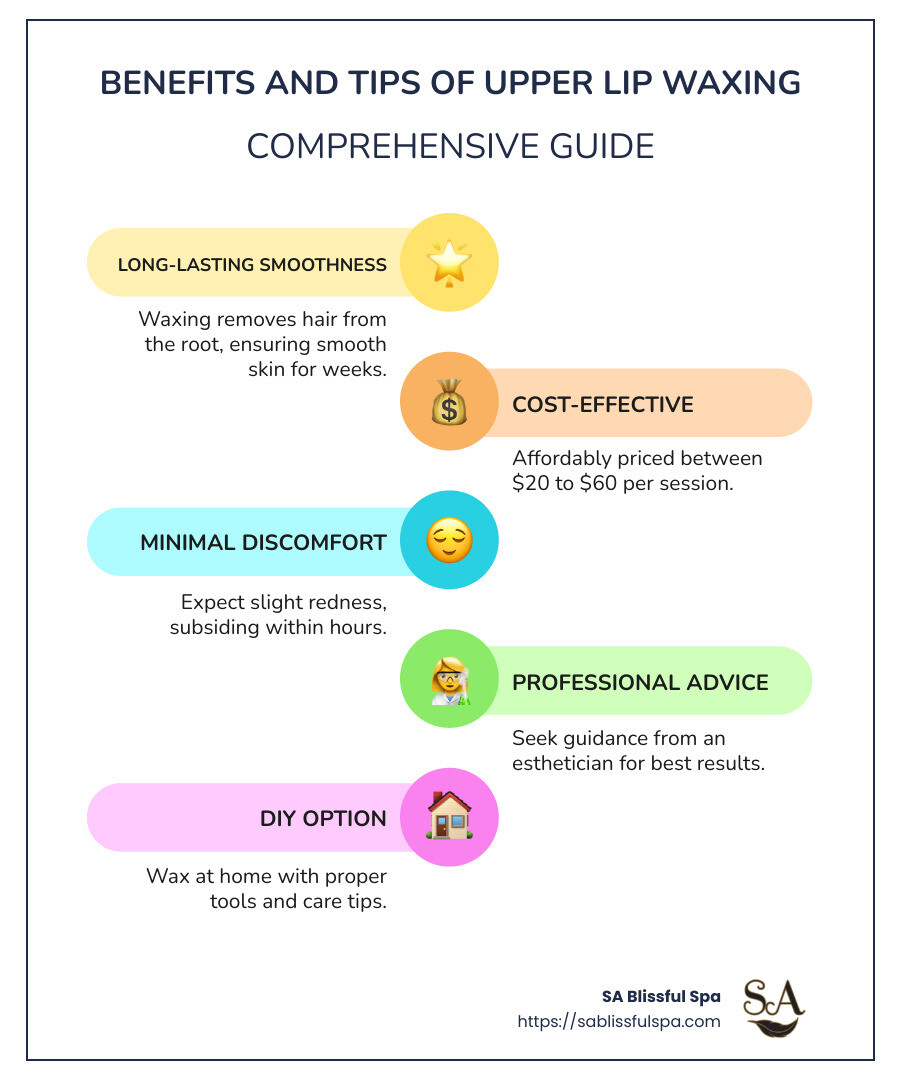
- Long-lasting Benefits: Waxing pulls hair from the root, which means smoother skin for weeks, not days.
- Cost-Effective: Prices vary widely, with average costs for waxing services ranging significantly depending on location and provider. On average, expect between $20 to $60.
- Minimal Discomfort: It's normal to experience slight redness or irritation immediately after waxing, but this typically subsides within a few hours.
Whether done at home or professionally, understanding the basics of upper lip waxing can help you make informed choices about your grooming routine.
As an esthetician and founder of SA Blissful Spa, I, Saloni Bhandari, bring years of expertise in upper lip waxing to the table. My commitment is to guide you through the process with ease and comfort as you pursue this hair removal method for a polished look.
Why Choose Upper Lip Waxing?
When it comes to managing
upper lip hair, waxing stands out for several compelling reasons. It’s not just about hair removal; it’s about achieving smoother skin and maintaining that confidence boost for longer periods.
Longer-Lasting Results
One of the primary benefits of
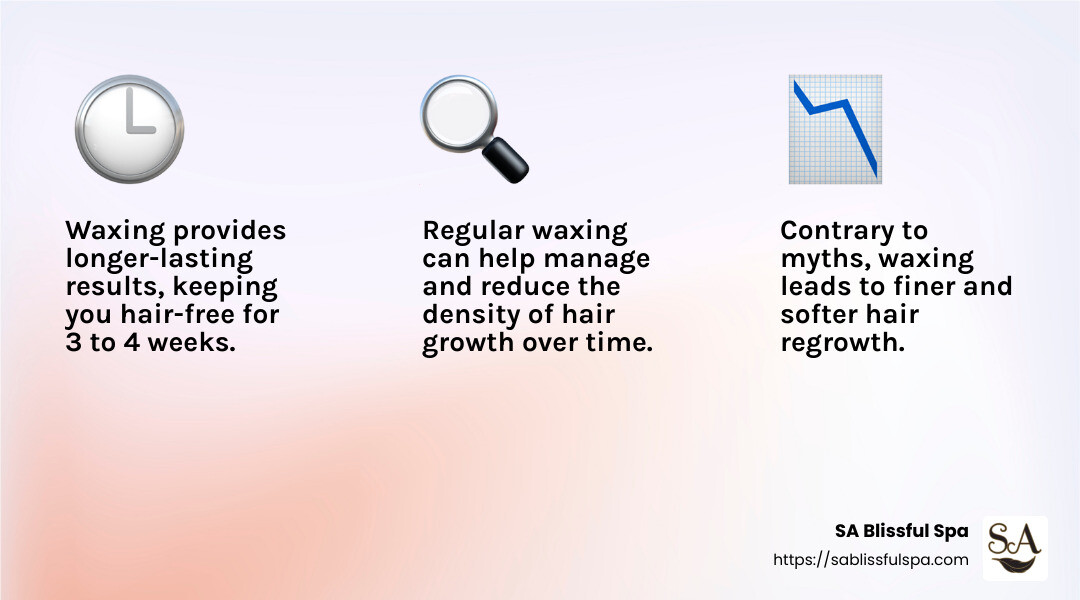
upper lip waxing is its long-lasting effect. Unlike shaving, which only cuts hair at the surface and requires frequent maintenance, waxing removes hair from the root. This means you can enjoy smooth, hair-free skin for about 3 to 4 weeks. As the hair grows back, it does so more slowly, giving you more time between sessions.
Finer Regrowth
A common myth is that waxing makes hair grow back thicker. In reality, waxing often results in finer and softer regrowth. Since the hair is pulled from the root, the new hair that grows back often has a tapered end, making it feel softer and look less noticeable. This is a significant advantage for those concerned about visible hair growth on the upper lip.
Manage Hair Growth
Regular waxing can help manage hair growth over time. By consistently removing hair from the root, some people notice that their hair grows back less densely. This doesn’t mean hair will stop growing altogether, but it can become more manageable with regular waxing sessions.
Convenience and Confidence
For many, the convenience of waxing is best. It’s a quick procedure, whether done at home or by a professional. The confidence boost from having a smooth upper lip can be significant, helping you feel more comfortable in social situations.
Choosing
upper lip waxing is about more than just hair removal; it’s about achieving a look that helps you feel your best. Whether you opt for professional services or decide to try it at home, understanding the benefits can help you make the right choice for your grooming needs.
Next, we'll explore how to effectively wax your upper lip at home, ensuring safe and smooth results.
How to Wax Your Upper Lip at Home
Step-by-Step Guide
Waxing your upper lip at home can be a convenient way to manage hair growth while maintaining smooth skin. Follow these steps for safe and effective results.
1. Exfoliate Your Skin
Start by exfoliating your skin the night before you plan to wax. This removes dead skin cells and helps prevent ingrown hairs. Use a gentle exfoliating scrub to ensure the surface is clean and smooth. This step is crucial for optimal wax adhesion and hair removal.
2. Prepare Your Wax
Turn on your hard wax warmer and add the wax beads. Set the temperature to the highest setting to melt the wax completely. Stir occasionally to ensure even melting. Once melted, lower the temperature to a level indicated by your wax formula, allowing it to cool to a thick, honey-like consistency. This texture ensures the wax grips the hair effectively.
3. Apply Pre-Wax Gel
Before applying wax, use a pre-wax gel on your upper lip. This prepares the skin and minimizes irritation. For sensitive skin, choose a formula specifically designed to reduce redness and discomfort. Allow the gel to absorb fully into the skin before proceeding.
4. Apply the Wax
Using a spatula, apply the wax in the direction of hair growth. Create a small lip at the end of the wax strip for easy removal. Let the wax cool until it becomes semi-hardened. This ensures maximum hair removal with minimal discomfort.
5. Remove the Wax
Hold the skin taut with one hand. With the other hand, quickly remove the wax strip in the opposite direction of hair growth. Always pull the wax parallel to the skin to avoid lifting or irritation. This technique ensures a cleaner removal and reduces the risk of skin damage.
6. Post-Wax Care
After waxing, soothe the area with a post-wax lotion to prevent breakouts and inflammation. Follow up with a post-wax oil to remove any residue and lock in hydration. This step is essential for calming the skin and maintaining its smoothness.

By following these steps, you can achieve professional-level results at home. Practice makes perfect, so take your time and be
gentle with your skin.
Next, we’ll compare professional and DIY upper lip waxing to help you decide which method suits your needs best.
Professional vs. DIY Upper Lip Waxing
Choosing between
professional upper lip waxing and DIY methods can be a big decision. Both options have their benefits, but understanding each can help you make the best choice for your skin.
Professional Esthetician
Visiting a professional esthetician for your upper lip waxing has some clear advantages. Professionals are trained to handle delicate skin with care, minimizing the risk of irritation and redness. They also use high-quality waxes that suit different skin types, ensuring a more comfortable experience.
In a professional setting, you'll receive pre- and post-wax care that can significantly reduce the chances of breakouts. Salons like
SA Blissful Spa offer a serene environment, which makes the experience more relaxing. Plus, you can trust the expertise of skilled technicians to achieve precise results.
At-Home Waxing
On the other hand, DIY waxing at home can be a convenient and cost-effective option. It's perfect if you have a busy schedule or prefer privacy. However, it requires practice to master the technique. Start by investing in a good wax kit and follow safety tips to protect your skin.
Here are some essential safety tips for at-home waxing:
- Test the Wax Temperature: Always test a small amount on your wrist to ensure it's not too hot.
- Patch Test: Apply wax to a small area first to check for any allergic reactions.
- Avoid Overlapping: Never apply wax over the same spot twice in one session to prevent irritation.
- Follow Instructions: Carefully read and follow the instructions on your wax kit for best results.
Deciding What's Best for You
Your choice between professional and DIY upper lip waxing depends on your comfort level and skin sensitivity. If you're new to waxing or have sensitive skin, starting with a professional might be wise. For those who are confident and experienced, at-home waxing can be a great way to maintain smooth skin on your own schedule.
Next, we'll explore whether upper lip waxing is the right choice for you, especially if you have sensitive skin.
Is Upper Lip Waxing Right for You?
Deciding whether
upper lip waxing is the right choice depends on several factors, especially if you have sensitive skin. Let's explore what you need to know about irritation and redness, common concerns after waxing.
Sensitive Skin
If you have sensitive skin, waxing can be a bit tricky. Sensitive skin is more prone to irritation, so the process might feel more uncomfortable. It's crucial to inform your esthetician about your skin type before the session. They can adjust their approach and use gentler products to minimize discomfort.
For those considering at-home waxing, you might want to start with a patch test. Apply a small amount of wax to a less visible area to see how your skin reacts. This step helps prevent any major reactions on your face.
Irritation and Redness
Experiencing some redness or irritation after waxing is perfectly normal. According to
research, this is a common immediate reaction, especially if it's your first time or if your skin is sensitive.
Here are some tips to manage irritation and redness:
- Apply a Soothing Cream: Use a cream recommended by your esthetician to calm the skin.
- Avoid Touching: Refrain from touching or scratching the waxed area to prevent further irritation.
- Stay Away from Sun: Keep the area out of direct sunlight for a day or two, as it can worsen redness.
Is It Right for You?
Whether
upper lip waxing is right for you depends on your skin type and personal comfort. If you're worried about irritation, consulting with a professional can help you make an informed decision. They can offer personalized advice and aftercare tips custom to your skin's needs.
Next, let's tackle some frequently asked questions about upper lip waxing to clear up any lingering doubts.
Frequently Asked Questions about Upper Lip Waxing
How long do results last?
When you choose
upper lip waxing, you can expect smooth, hair-free skin for about 3 to 4 weeks. This duration can vary depending on your personal hair growth cycle. Unlike shaving, which only cuts hair at the surface, waxing removes hair from the root. This means it takes longer for the hair to grow back, giving you more time to enjoy that silky-smooth feel.
Will waxing make hair grow back thicker?
There's a common myth that waxing causes hair to grow back thicker and darker. In reality, this is not true. Waxing actually tends to result in finer and sparser regrowth over time. By removing hair from the root, the follicle can weaken, leading to less dense hair growth. So, with regular waxing sessions, you may find that your hair becomes softer and less noticeable.
Is redness normal after waxing?
Yes, experiencing some redness and irritation after waxing is completely normal, especially if you're new to the process or have sensitive skin. This temporary reaction usually fades within a few hours to a day.
Here are some aftercare tips to help minimize redness and soothe your skin:
- Use a Cool Compress: Apply a cool, damp cloth to the area to reduce inflammation.
- Moisturize Gently: Use a mild, fragrance-free moisturizer to keep the skin hydrated.
- Avoid Harsh Products: Steer clear of products with alcohol or strong chemicals that can irritate the skin further.
Following these aftercare steps can help your skin recover quickly, leaving you with
smooth and beautiful results.
Next, we'll explore the differences between professional and DIY upper lip waxing to help you decide which option might be best for you.
Conclusion
At
SA Blissful Spa, we understand that your skin deserves the best care possible. Our personalized approach to skincare and beauty treatments ensures that every visit leaves you feeling refreshd and confident.
Our expert treatments, including
upper lip waxing, are designed with your unique needs in mind. We prioritize your comfort and satisfaction, using gentle techniques and high-quality products to achieve the best results. Our skilled estheticians are committed to providing you with a smooth, hair-free experience while minimizing any discomfort or irritation.
By choosing SA Blissful Spa, you're not just opting for a service; you're investing in your skin's health and beauty. We invite you to experience the difference that expert care and personalized attention can make. Whether you're new to waxing or a seasoned pro, our team is here to guide you every step of the way.
Visit us at our Burlington location or any of our other convenient spots across Massachusetts to find the benefits of our luxurious treatments. Let us help you achieve the radiant, smooth skin you deserve.