Why Getting the Hair Length Right Is Critical for Waxing Success
The best way to wax starts with one simple but crucial step: getting your hair length just right. If it’s too short, the wax won’t grip properly. If it’s too long, you’ll experience unnecessary pain and potential hair breakage instead of clean removal from the root.
Quick Answer: The Best Way to Wax Successfully
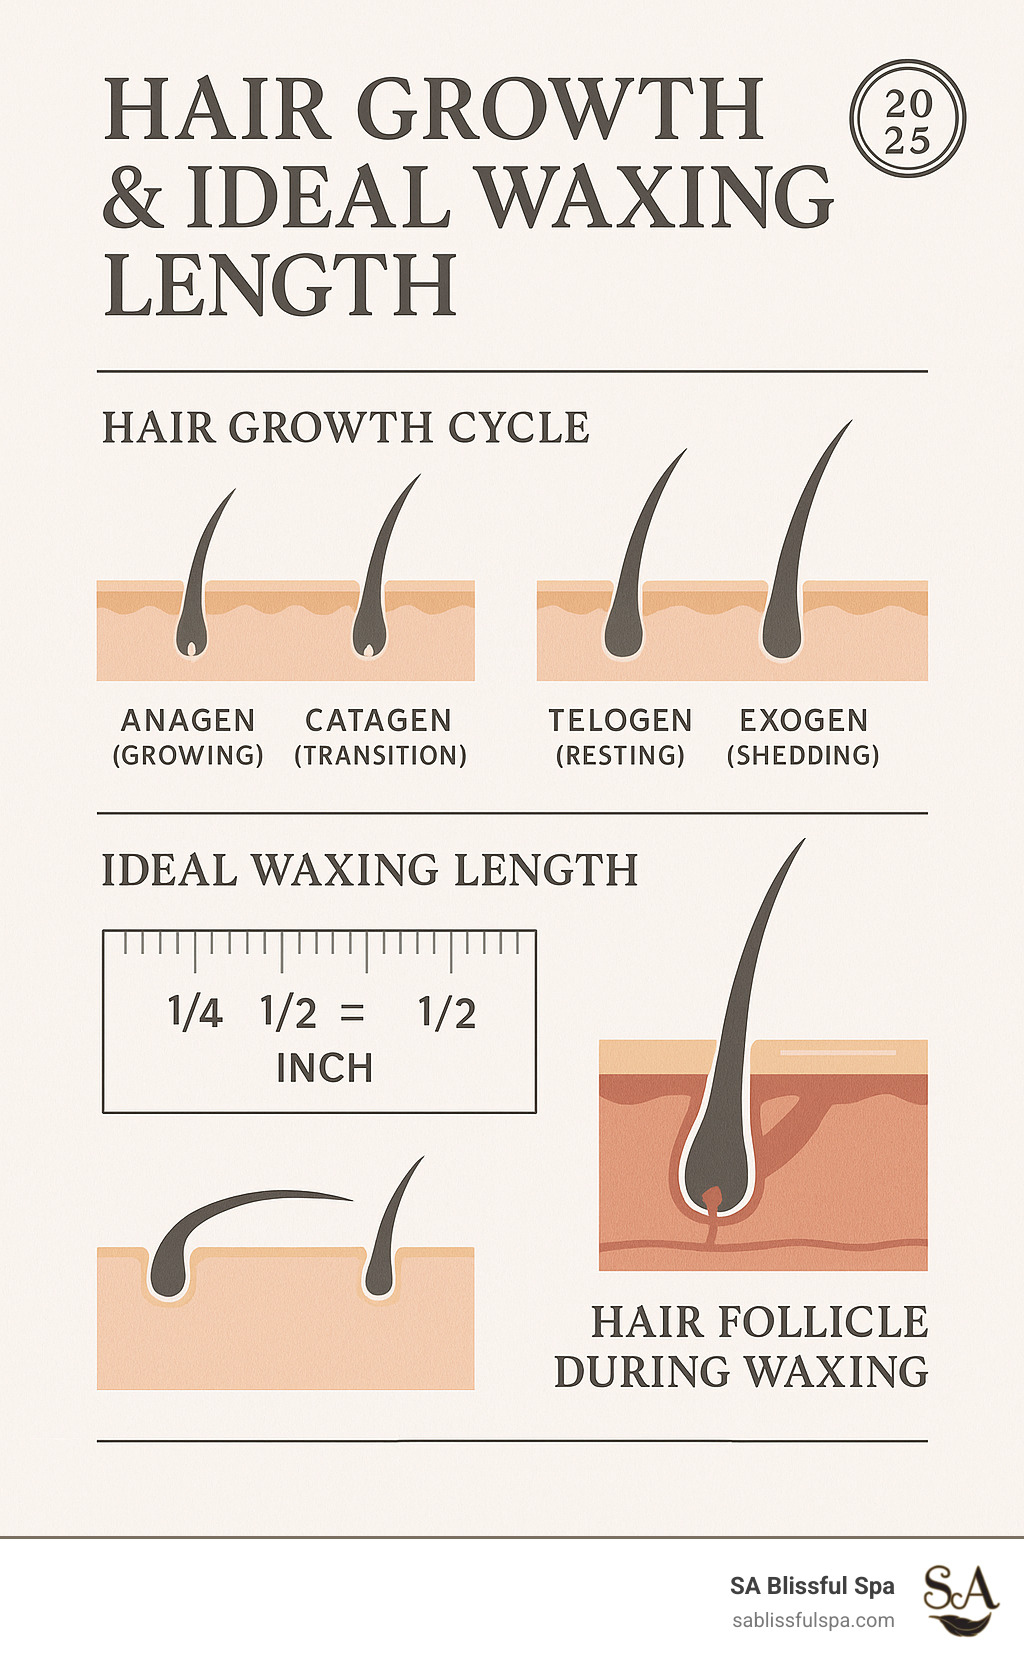
- Hair Length: 1/4 to 1/2 inch (about 1 cm) for optimal grip.
- Preparation: Exfoliate 24-48 hours before, then cleanse and dry skin thoroughly.
- Wax Choice: Hard wax for sensitive areas, soft wax for large areas like legs.
- Application: Apply in the direction of hair growth, remove against it.
- Aftercare: Use soothing oil, and avoid heat and tight clothing for 24 hours.
According to dermatological guidelines, hair needs to be at least a quarter-inch long for wax to grip effectively. This allows the wax to wrap around each hair shaft and pull it cleanly from the follicle. The American Academy of Dermatology also recommends trimming hair to about three-quarters of an inch if it’s too long, as this minimizes pain and prevents breakage.
As the founder of SA Blissful Spa, I’ve seen that success with at-home waxing comes down to mastering the basics of preparation and technique. Understanding these details is fundamental to finding the best way to wax.
Important best way to wax terms:
The First Step: How to Prepare Your Skin for Waxing

Proper skin preparation is the foundation of a successful waxing session. It minimizes pain, prevents ingrown hairs, and ensures the wax grabs hair, not skin. Following these simple prep steps is the first half of mastering the best way to wax at home. The American Academy of Dermatology emphasizes that proper preparation is key to safe and effective hair removal.
The Golden Rule of Hair Length
For the best way to wax, your hair should be between 1/4 inch to 1/2 inch long (about 1 cm), roughly the size of a grain of rice. This length gives the wax something substantial to grip.
- If hair is too short (less than 1/4 inch), the wax can’t get a good hold, leading to multiple passes and skin irritation.
- If hair is too long (over 3/4 inch), it can tangle in the wax, making removal more painful and causing hair to break instead of pulling from the root. Trim it down before you start.
The key is patience. If your hair isn’t quite ready, give it a few more days to grow.
Exfoliate and Cleanse for Better Results
With your hair at the perfect length, it’s time to prepare your skin. This step makes a world of difference.
- Exfoliate 24-48 hours before waxing. Use a body scrub or loofah to gently buff away dead skin cells. This helps prevent ingrown hairs and allows the wax to adhere better to the hair.
- On waxing day, cleanse thoroughly. Use a mild soap to remove any dirt, oils, or lotions that could interfere with the wax.
- Dry your skin completely. Wax and moisture don’t mix. Pat the area dry with a clean towel and let it air dry for a few minutes. Avoid applying any lotions or oils before waxing; save those for aftercare.
Choosing the Right Wax for a Flawless Finish

With your skin prepped, the next step is selecting the right wax. Understanding the differences between hard, soft, and cold wax is key to choosing the best way to wax for your specific needs.
Hard Wax vs. Soft Wax: What’s the Difference?
- Hard Wax: This wax is applied warm, hardens as it cools, and is removed without strips. It adheres primarily to the hair, not the skin, making it gentler and less painful for sensitive areas like the bikini line, underarms, and face. It’s ideal for coarse hair. You can learn more about this versatile option on our dedicated Hard Wax page.
- Soft Wax: Also known as strip wax, this is applied in a thin layer and removed with a fabric strip. It adheres to both hair and skin, providing light exfoliation. It’s efficient for larger areas with finer hair, like legs and arms. However, it cannot be reapplied to the same area in one session.
- Cold Wax Strips: These pre-waxed strips are warmed between your hands, applied, and pulled off. They are convenient for home use on finer hair but may be less effective on coarse hair and don’t provide the pore-opening benefits of warm wax.
[TABLE] comparing Waxing and Shaving
To understand the best way to wax, it helps to compare it with shaving.
| Method |
Results Duration |
Pain Level |
Best For |
Pros |
Cons |
| Waxing |
3-4 weeks (up to 6 weeks with regular waxing) |
Moderate (especially first time), lessens over time |
All body parts, especially sensitive areas like bikini, underarms, face |
Removes hair from root, longer-lasting smoothness, hair grows back finer/softer, less stubble, acts as exfoliant |
Can be painful, risk of irritation/ingrown hairs if not done properly, requires hair growth, can be costly (professional) |
| Shaving |
1-3 days |
Generally painless |
Quick touch-ups, daily hair removal |
Quick, easy, painless (if done correctly), accessible, no hair growth needed |
Short-lasting results, quick stubble, razor burn, nicks/cuts, ingrown hairs, skin irritation, can cause skin discoloration |
Waxing provides significantly longer-lasting smoothness by pulling hair from the root, unlike shaving which only cuts hair at the surface. This means hair-free skin for weeks, not days.
The Best Way to Wax: A Step-by-Step Guide for Different Body Parts
Now that you’re prepped, let’s dive into the process. Performing the best way to wax at home requires the right tools and technique.

Gather your supplies before you begin:
- Wax Warmer: Essential for maintaining a safe, consistent temperature for hard or soft wax.
- Quality Wax: Hard wax for sensitive areas, soft wax for larger areas.
- Pre-Epilation Cleanser: To clean the skin and ensure proper hygiene.
- Applicator Sticks: Use a new stick for each dip to prevent contamination.
- Pellon or Muslin Strips: Necessary for removing soft wax.
- Post-Wax Oil or Lotion: To remove residue and soothe the skin.
- Tweezers: For any stray hairs the wax might miss.
The Correct Technique for the Best Way to Wax
- Heat Wax Safely: Follow the manufacturer’s instructions. Test the temperature on your inner wrist; it should feel warm, not hot.
- Apply Wax: Using an applicator, apply a thin, even layer in the direction of hair growth.
- Hold Skin Taut: With your free hand, pull the skin taut to create a firm surface and minimize pain.
- Remove Wax: In one swift motion, pull the wax or strip off in the opposite direction of hair growth. Keep your hand parallel to the skin, don’t pull upwards.
- Soothe Immediately: After pulling, press your hand firmly on the waxed area to calm the nerve endings.
- Avoid Reapplication: Do not wax the same area more than twice. Tweeze any missed hairs to avoid irritation or skin lifting.
How to Wax Sensitive Areas: Face, Underarms, and Bikini Line
These areas require extra care. Use hard wax and work in small, manageable sections.
- Underarms: Hair often grows in different directions, so you may need to wax in two separate sections. Keep skin taut by raising your arm. For more tips, see our guide on Armpit Waxing.
- Face (Upper Lip, Eyebrows): Use a wax kit specifically for the face. Be extremely cautious around the eyebrows; this is often best left to professionals. Learn more about Face Waxing for Women.
- Bikini Line: Hard wax is preferred here. Use a mirror for visibility. For full Brazilian or Hollywood waxes, we strongly recommend visiting a professional, as the risk of injury is much higher with at-home attempts.
Soothe and Protect: Essential Post-Waxing Aftercare
Proper aftercare is just as vital as preparation for achieving the best way to wax results. It’s all about soothing your skin, preventing infection, and combating ingrown hairs.
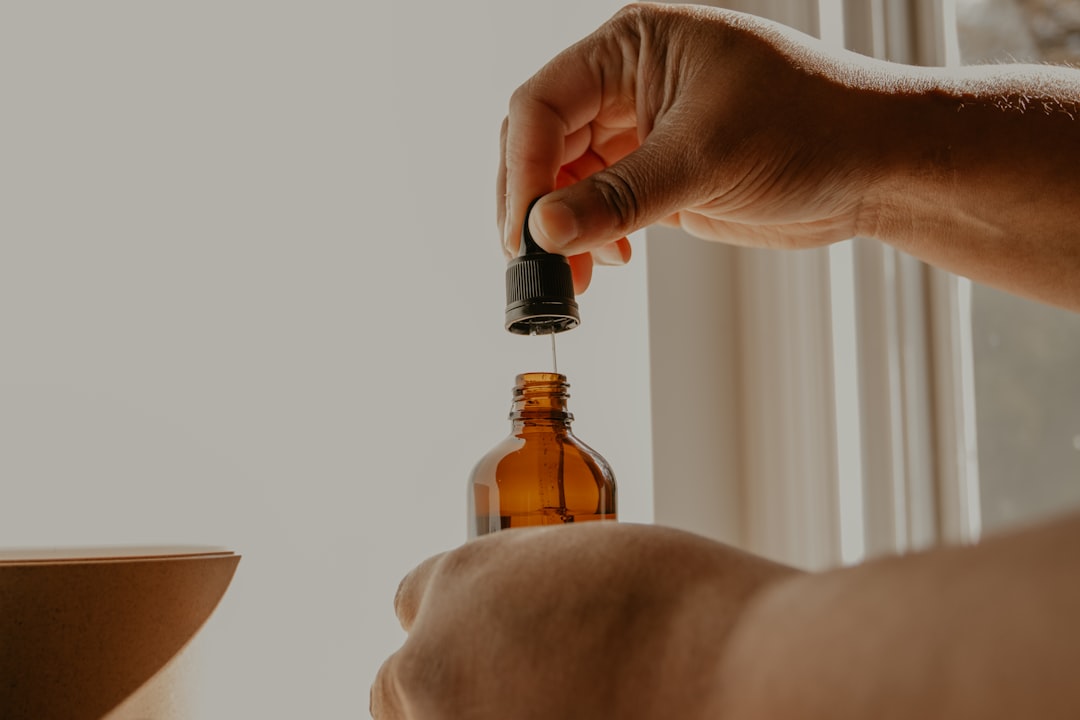
Your skin will likely be red and sensitive. Here’s how to care for it:
- Remove Residue: Use a specialized wax remover or natural oil (like baby or jojoba oil) to gently wipe away sticky residue.
- Soothe Skin: Apply a fragrance-free lotion or gel with calming ingredients like aloe vera or chamomile.
- Avoid Heat and Friction: For 24 hours, avoid hot showers, baths, saunas, and strenuous exercise that causes sweating.
- Wear Loose Clothing: Tight clothing can trap sweat and cause friction, leading to irritation and ingrown hairs.
Long-Term Care and How Often to Wax
To maintain your results, incorporate these long-term practices:
- Exfoliate Regularly: Starting 24-48 hours after waxing, gently exfoliate 2-3 times a week. This prevents dead skin buildup that can cause ingrown hairs. Chemical exfoliants with AHAs are particularly effective.
- Moisturize Daily: Keep skin hydrated with a lightweight, non-comedogenic lotion to maintain its elasticity.
- Waxing Frequency: Waxing every 3 to 4 weeks is ideal. This aligns with the hair growth cycle and, over time, can lead to finer, sparser regrowth. For specific guidance, see our Brazilian Wax Aftercare Tips.
Waxing Wisely: Avoiding Risks and Common Mishaps
At-home waxing is convenient, but knowing how to handle potential issues is key to a successful experience. Here’s how to find the best way to wax with confidence.
How to Handle Common Waxing Problems
- Sticky Residue: Don’t use soap and water. Gently rub the area with an oil-based product like baby oil or a dedicated wax remover.
- Ingrown Hairs: Prevent these with regular exfoliation and moisturizing. If one appears, don’t pick or squeeze it. Continue to gently exfoliate the area.
- Red Bumps or Pimples (Folliculitis): This is often minor inflammation of the hair follicle. Keep the area clean and apply a soothing lotion. If bumps are persistent or contain pus, it could be a bacterial infection, so consult a professional if it doesn’t clear up.
- Minor Burns: If the wax is too hot, immediately cool the area with cold water for 5-15 minutes. Apply aloe vera gel or an antibiotic ointment. Seek medical attention for severe burns or blistering.
- Skin Lifting or Bruising: This can happen if skin isn’t held taut or if you wax the same spot twice. Treat it like a minor burn, keeping it clean and protected. Never wax the same area more than once per session.
When to Avoid Waxing
Sometimes, it’s wiser to pause your waxing plans. Avoid waxing under these conditions:
- Compromised Skin: Do not wax over skin that is sunburned, irritated, broken, cut, or has rashes or active infections.
- Certain Medications: Some medications increase skin sensitivity. Avoid waxing if you are taking oral retinoids like Accutane (wait 6-12 months after stopping). If using topical retinoids (like Retin-A) or strong exfoliants (AHAs/BHAs, benzoyl peroxide), stop application to the area at least a week prior.
- Medical Conditions: If you have diabetes, circulatory problems, or other conditions that affect skin healing, consult your doctor before waxing.
- Recent Treatments: Wait until your skin has fully healed from any recent laser treatments or chemical peels.
If you’re ever unsure, consult a dermatologist using a resource like the American Academy of Dermatology’s \”Find a Dermatologist\” tool. For guaranteed safety and flawless results, consider Professional Hair Wax Removal.
Frequently Asked Questions about the Best Way to Wax
Here are answers to some common questions to help you feel confident about finding the best way to wax.
Does waxing hurt less over time?
Yes, absolutely! While the first session can be uncomfortable, it generally becomes much easier with consistent waxing. This is because waxing pulls hair from the root, causing it to grow back finer and softer. Over time, the hair follicles can weaken, making removal less painful. Your body also becomes more accustomed to the sensation.
Why do I get bumps or pimples after waxing?
Small red bumps are a common reaction and usually due to one of two things. The first is folliculitis, a minor inflammation of the hair follicle that can occur when bacteria enter the open pore. The second is simple irritation from the act of hair removal. Both can be minimized by ensuring your skin is clean before waxing and following proper aftercare, such as avoiding heat, friction, and tight clothing. The bumps usually subside within a day.
Can I wax the same spot twice in one session?
We strongly advise against this. Re-waxing the same area in one session significantly increases the risk of irritation, bruising, and “skin lifting” (where a layer of skin is removed with the wax). Freshly waxed skin is sensitive and needs time to recover. The best way to wax and handle any stray hairs is to use a clean pair of tweezers to pluck them individually, which is much gentler on your skin.
Conclusion: Your Path to Perfectly Smooth Skin
Wow, what a journey we’ve been on! You’ve learned so much about the best way to wax at home. We’ve covered everything from getting your hair length just right (that crucial prep!), to choosing the perfect wax, and mastering the right technique for different body parts. And of course, we can’t forget the super important aftercare steps to keep your skin happy and smooth. You’re now equipped with the knowledge to tackle at-home waxing with confidence!
But let’s be honest, sometimes you just want to relax and leave it to the pros, especially for those trickier spots or when you need that extra flawless finish. While DIY waxing is great for convenience and saving a few bucks, there’s nothing quite like the precision and peace of mind you get from a professional.
That’s where we come in! Here at SA Blissful Spa, we absolutely love helping you achieve that perfectly smooth, radiant skin. Our amazing estheticians are experts in all things waxing, offering a comfortable, hygienic, and truly effective experience. We’re here to make sure your waxing journey is always the best way to wax for your unique skin. So, if you’re ever looking for a guaranteed perfect and safe experience, why not let us pamper you? We invite you to explore our professional waxing services and experience the SA Blissful Spa difference.